Metal Roofing
Metal roofing has a different installation process from traditional asphalt roofs. In this blog we discuss where they are different, and where they aren't.
If you’re looking for a roof replacement, picking your material is a big part of the process, and a huge decision for the future of your home.
You may not think about your roof all the time, but you probably see it every day, out of the corner of your eye, at least. A roof that’s nice to look at, and installed properly, will last you a long time, and go a long way towards increasing the value of your home.
The options you have available to you will differ depending on where you live, but most areas of the country have companies that will install asphalt shingle, and metal panel roofs.
We’ve already gone over the process of installing an asphalt shingle roof, and though they share some steps, the way that a metal roof is installed is pretty different.
In this blog, we are going to talk about:
- The materials needed for a standing seam metal roof replacement
- The steps to install a standing seam metal roof
- The difference between standing seam metal and screw-down panels
Let’s Get Started!
Materials Needed for a Standing Seam Metal Roof Replacement
Before we dive into the materials that make up a standing seam metal roof, you need to have a good understanding of what a standing seam metal roof is.
A standing seam metal roof consists of multiple metal panels that lock together at the seams and are fastened underneath the panel, as opposed to being screwed through into the roof decking. This is done because metal tends to expand and contract as it heats and cools, and the fasteners being underneath allows the roof to flex naturally with this process.
So with that knowledge, we can talk about the individual bits that make up the roof system!
- Roof decking: The boards of wood, usually plywood or oriented strand board (OSB), that your roofing material is installed on top of.
- Underlayment: A material, usually felt or rubber, that is used to cover your roof decking, adding another layer of protection from water damage. Metal roofs typically use a high-heat ice and water shield that won’t stick to the metal or melt.
- Lock Strip: A strip of metal that is used at your roof’s gable and rake edges to hold it in place during high winds.
- Drip edge: Pieces of metal that are installed on the edges of the roof that ensure water runs off into the gutters, instead of wrapping around and getting under the roofing material.
- Metal Panels: The top layer of a standing seam roof, can be made of different materials or metal combinations, and in a wide variety of colors.
- Clips: Used to secure the metal panels to the roof decking, installed below the panels.
- Z bar: Metal flashing that connects the metal panels to the ridge cap.
- Ridge Cap: Metal that is installed on the ridge of the roof, covering the gap between the panels.
The Steps of Installing a Standing Seam Metal Roof
There are really six main steps that are involved in installing a standing seam metal roof: tearing off the old roof, installing the lock strips, laying ice and water shield/underlayment, putting on your metal panels, installing your Z-bar flashing, and finishing off the roof with a ridge cap.
Step 1: Tear Off Old Roofing Materials
Regardless of what kind of roof is going to go on your home, you’ll always need to remove the old roofing materials. Your roofing contractor will tear off all of the old shingles or metal, and replace any decking that needs to be replaced.
This step is super important because it allows for you to have a true idea of what damage has been done to your roof, and what the condition of the decking is. Some roofing contractors may offer to install a roof over top of the existing one, but be wary if they do. In several states, doing this is illegal, and even if it is in your area, we don’t recommend it.
Most of the time, these installations are not done correctly, and will lead to you needing a repair or replacement much sooner than you would have otherwise.
Step 2: Install lock strips & drip edge
Once they're working with a clean roof deck, your contractor will start installing the lock strips and drip edge to prevent wind and water from getting up under your new metal panels.
These materials are usually installed at the eaves and rakes of your roof, or the horizontal and diagonal edges of the roof, respectively.
Step 3: Put down underlayment/ice and water shield
Next up, your contractor will install an underlayment or ice and water shield, which will help further waterproof your roof, and protect the decking from any potential leaks that may get through.
Underlayment is usually made of felt, while ice and water shield is often produced using asphalt. For metal roofs however, the ice and water shield that will be used is called high heat ice and water shield. This variety is made using a cotton-like fiber that won’t stick to the metal the same way asphalt would.
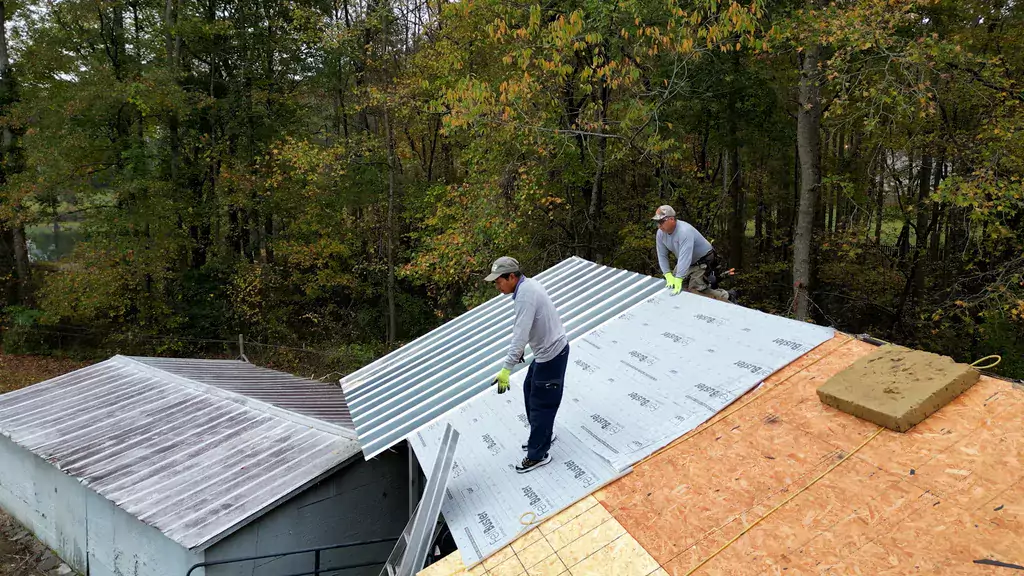
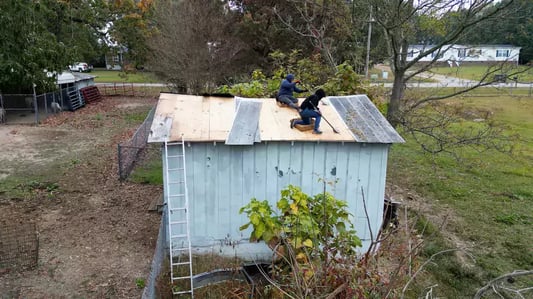
Step 4: Install the Standing Seam Metal Panels
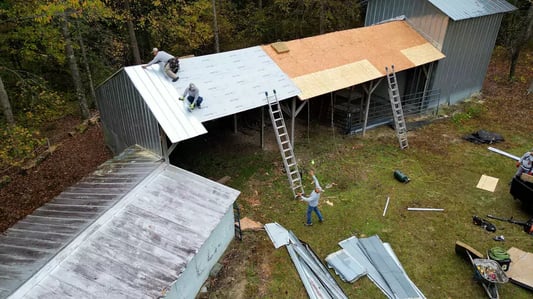
After everything has been prepared, it comes time for the first line of defense to be installed, the metal panels.
The first panel to be installed will be cut off at the seam and hooked onto the lock strip at one of the rake edges of your roof. Then, clips and screws will be used to fasten the panels to each other, and to the roof.
Step 5: Install Z bar flashing between panels at the ridge.
Once metal panels are covering the whole roof, the gap between them on the ridge of your roof will need to be filled in. The way this is done is by bending a piece of metal into a Z shape, making it slightly taller than the ribs of metal seams on your roof.
The Z bar does a great job of preventing water from getting up under the gap between the panels and the ridge cap, that is created by the seams on the roof being taller than the rest of the surface.
Step 6: Put the Ridge Cap in its Place
The last step will be to install your roof’s ridge cap, which will be of the same material, color, and look as your metal panels.
The ridge cap is pretty much exactly as it sounds, a section of metal designed to cover the section where your Z bar was just put in. They’re also used to create an additional layer of dimension on a roof, which most homeowners tend to find aesthetically pleasing. Once this is in, everything will be locked together, and the roof will be complete!
What is the Difference Between Standing Seam Metal and Screw-Down Panel Metal?
In this blog, we’ve talked a lot about how a standing seam metal roof is installed, but are there any other kinds of metal roofs out there?
Actually, yes! Another popular type of metal roofing material are screw-down panels, which are installed differently than standing seam panels. The primary difference here is that screws are driven down through the metal to secure it to the roof decking. This type of roof is very often installed over areas like barns and sheds, but isn’t usually recommended to be put over homes, or other heated spaces.
If you want to learn more about the differences between standing seam and screw-down metal roofs, read the blog we’ve written about that topic!
On Tops Roofing has been conducting metal roof replacements and repairs in the Raleigh, NC area for over 30 years! If you have any questions about getting a metal roof for your home, give us a call! We’ll be happy to help!